On Friday we decided it was time to remove the wooden box that held three florescent light fixtures and see why the ceiling in that room had been dropped from it's ten foot height. What follows are the pictures that answers that question.
I'll try to put the pictures in a logical order. Sorry to those who have already seen these on Facebook.
These are the fixtures; which Richard has disconnected at this point.
This is the sides of the box; the bottom edge was flush with the dropped ceiling.
Richard is holding the two pieces once we had them out. You see that chord?
It comes from here, the junction box for the three fixtures.
This plug was on the end; (we have not changed anything) that is what it looked like after we unplugged it...
from here. Yes, this is on the inside of the dropped ceiling and

this is the socket we removed that plug from. How is that socket wired? Thank you for asking.
This is the chord leading from that socket which was then connected to...
the wiring for a light fixture in the original plaster and lathe ceiling. None of this is a safe way to do wiring.
Sitting on the dropped ceiling you will notice, what we can only speculate, are the original tiles from the dropped ceiling.
We finally found out why the need to drop the ceiling. All the plumbing for the upstairs bathroom was dropped down through the ceiling instead of being placed between the floor and ceiling cavity or running pipes down wall cavities. We also discovered why the upstairs toilet does not always flush very well. the waste pipe runs uphill. We still have to figure out all the pipes the PVC is for waste, the copper is either hot, cold or for radiators, but I also think one may be for waste.
These we think are from the bathtub taps and drain and is not far from the wiring.
This PVC pipe we believe is from the toilet, sorry I don't have a picture that shows the angle of this pipe. All these copper pipes are either hot and cold supply or radiator the bigger diameter one I believe is waster.
We have no idea why this pipe is going over to the far corner or what it is for and of course more ceiling tiles.

Just another picture showing the above pipe trying to see what that piece of strapping is holding up.

There are several different sets of pipes here the one that leads of to that far corner with another three that head down to the basement or the bathroom that we are in and of course more of those tiles.
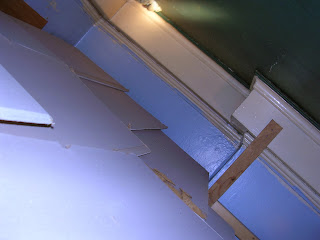
Now I was hoping for ceiling moldings like the living room. There are moldings around the top of the walls. which I love, but none cross hatching the ceiling. The next pictures show the molding, it is a shame that it is hidden in a ceiling.
The hole in the corner with a towel stuffed in it, we have no idea why other than perhaps they drilled in the wrong place for the toilet.
This is where the fire place continues up the wall. Again I was hoping for exposed brick, the blue paint makes me believe that maybe this has been a bathroom for a lot longer than we thought.
Trying to get a look at the wood on the left... is it the top of the window? Can't tell from this angle.
A patch that Richard removed, it confirms that the ceiling is original, plaster and lathe. Other things we saw have to be checked out before we discuss them.
These are tiles Richard was able to reach and remove from above that dropped ceiling, why would you leave these up there?
There was a lot of dust even though all we have done is remove the florescent lights and tiles from in the ceiling.
When we began the renovations in the kitchen we realized that we would be dealing with dust and just maybe lead in the paint or asbestos in other old building products. Richard had a hard time finding a good mask that would be small enough for me. I can't remember how many different masks I tried on, this was the winner and works really well. I also have safety glasses, which fit over my glasses. So I'm safe while doing these projects.


